All the Spokane food-related stuff that I can't figure out how to wedge into my other blog.

Wednesday, December 22, 2010

Cucidati


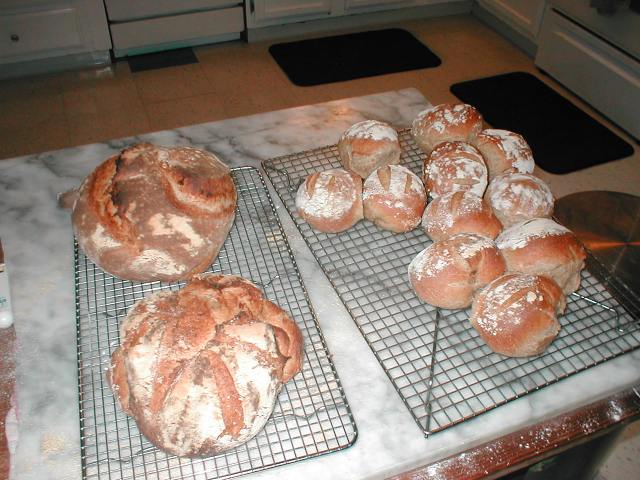
Another traditional Maria Christmas cookie. Yummy.

Liza found a dough recipe online. The filling is Maria-specific.

Stuff
Dough:
  • 8 cups flour
  • 1 1/3 cups sugar
  • 2 teaspoon baking powder
  • 2 teaspoon salt
  • 4 sticks butter, cold, chopped into cubes
  • 8 eggs, beaten
Filling
  • 2 cups roasted almonds, whole
  • 2 packages figs (need to look up size)
  • 1 ten oz package of pitted dates
  • 1/2 lb fruit cake mix (this is the tub of sugary dried orange/lemon peels, cherries, pine apple, etc)
  • 1.5 cups raisins
  • 8 oz semi-sweet or bitter sweet chocolate.
  • 1.5 cups espresso
Method

Dough
  1. Combine dry ingredients in a big bowl.
  2. Add butter cubes to flour and cut in with a pastry cutter until butter is about pea sized.
  3. Mix in beaten eggs to combine. Gently knead into a dough, add a bit of cold milk if needed.
  4. Refrigerate dough for an hour or so.
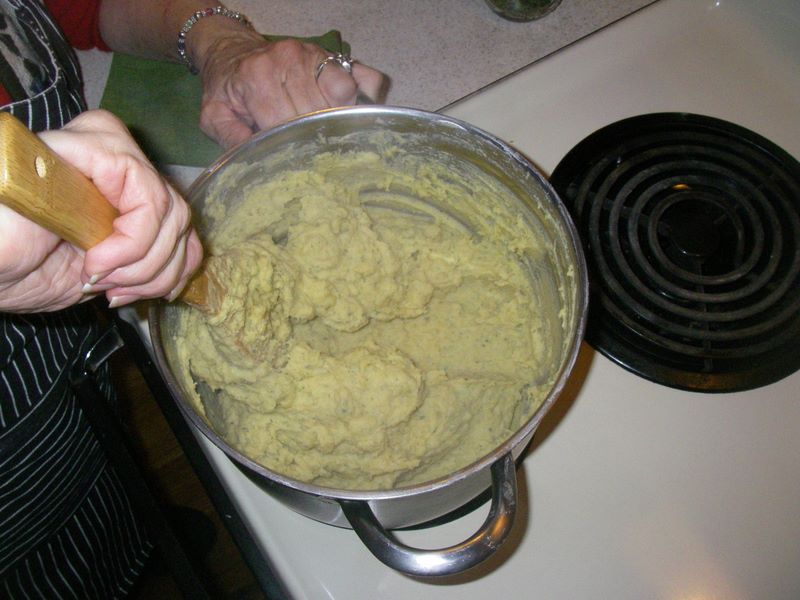
Filling
  1. Chop stem out of figs, chop fig into 2 or 3 chunks. Put figs into sauce pan and just cover with water. Simmer for about 20 minutes, until figs offer no resistance to being poked with a knife. Drain water.
  2. When figs are cool, chop them up in a food processor until pasty. Put them in a large sauce pan.
  3. Chop almonds in food processor until ground to lumpy pea-sized bits. Don't go crazy and make a powder/flour thing, you want the texture. Pour the almonds into the sauce pan with the fig gunk.
  4. Chop dates in food processor until nearly pureed. Put the date gunk into your sauce pan.
  5. Chop the raisins and fruit cake mix in the food processor. You may need to add a touch of water to get the fruit cake mix to break down a bit. Dump it in the sauce pan.
  6. Chop up the chocolate with a knife and toss it in the sauce pan.
  7. Pour the espresso into the mixture and mix it all up.

Assembly/cooking
  1. Preheat oven to 350F.
  2. Roll out a bit of dough into a thin strip about 3-4 inches wide and a foot or so long.
  3. Put a line of filling down the center of the rolled out dough - lenghtwise. Roll the dough around the filling.
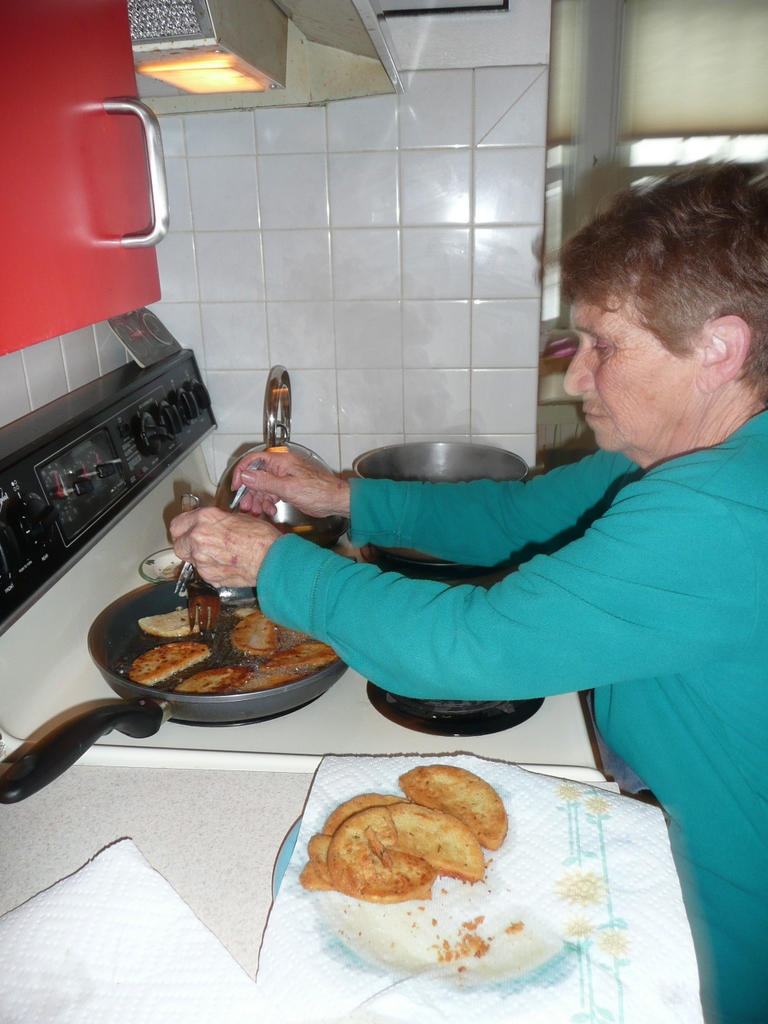
  4. Cut the roll into little cookes, then make a slice half-way lenght wise in the cookie. See picture:
  5. Bake for 15-20 minutes until golden.
  6. Cool. Ice (you can use the same icing recipe from here, but omit the anise). Sprinkle with bling.  

Mucho meat

Pate and gravlax are done.

I can see why we only make pate once a year, but I really need to do the gravlax more often.


The pate has some venison from Mr. McMortBorn in it. There's also a bit of chicken liver and lots of local pork. And some porcini mushrooms.


The gravlax is standard. Per my mom's and Julia's method: just salt/sugar blend and a splash of cognac. So simple and yummy that it's crazy we don't do this more often.


Great on a bagel with red onions and cream cheese.

Sunday, December 19, 2010

Non-stickify'ing a steel pan

The Before:
This pan is ready for re-non-stickify'ing.
This is scrambled egg detritus.
I love cooking on steel. It's predictable and when it's thick, it holds heat nicely. I have a couple cast iron pans and I have a couple traditional French steel saute pans. The fancy All-Clad stuff is nice, with its stainless steel around aluminum, but my daily drivers are these old steel chestnuts.

I run this procedure on them when they loose their luster. If I was the only one cooking (and cleaning) around here, they'd never loose their luster -- you can do stuff on the cooking and cleaning side of things to keep them non-stick forever -- but I'd rather just let others do their thing with the pans instead of standing over them and fussing.

The after: clean, shiny, non-sticky, and lovely.
If re-non-stickifying the pans was not as easy as it is, I probably would be more of a pain in the arse. But check this method out. It's so simple. I think some people might call this "seasoning" a pan. You can also do this with aluminum -- those cheap-ass restaurant Wear-Ever pans will take this method, but they give up the stickiness pretty quickly and under pretty low heat, so I'd only do aluminum if I was the only one using the pans ever.

I wouldn't do this to All-Clad pans, but I did this to my sister's set of Calphalon many many years ago and they took it well.

My great buddy Adam taught this to me when we were about 20 years old. By the time Adam was 20 he was fully obsessed with cooking; he'd been lead saute cook at Patsy Clarks in high school, line cook at Beverly's for a year or so, and he was CIA-bound. He learned this trick at SCC or at Beverly's before he left for New York a zillion years ago.

Anyway, this will make just about any steel (and some aluminum) pan non-stick. To keep it non-stick, use heat judiciously, stay away from high-acid foods, don't wash it in soapy water. Just wipe it out and apply a light coat of high-heat oil every now and then when the pan is hot and clean.

Stuff:
  • Kosher salt
  • Chunk of a burlap sack (potatoes still come in burlap -- or if you know coffee roasters, beans also come in burlap -- one coffee bag is a life time supply of burlap for this application)
  • Canola oil
  • One egg

Method:


  1. Put pan on high heat. Adam would argue that you must do this on about 20k btu's, but I do it on our dopey electric range and it's fine.
  2. Burlap on the left. Pan and salt on the right.
  3. Pour enough kosher salt in the pan to cover the entire surface with a thick layer of salt. 
  4. Let the pan heat up. I let it sit until it starts to smoke -- about 5 minutes.  
  5. Once it's hot (Adam would say "screaming hot"), push the salt into the bottom of the pan with your wadded up chunk of burlap. Burlap, for some reason doesn't burn/melt/smoke. I've tried this with a cotton kitchen towel and it doesn't work. Generally speaking, this is a fairly dangerous operation at this point. The salt is hot as shit and it likes to fall out or crowd up around your fingers.
  6. Keep grinding that salt into the steel surface. I'm thinking the idea here is that the surface of the pan is opening up a bit and the goal is to smooth out the rough texture of the steel by cramming hot salt into the open pores. But that's all guesses. Get in the edges too. If you're working a saute pan, try to get a centimeter or so up the sides.
  7. When you are satisfied that you've ground all you can, and/or you've burnt your finger enough, dump the salt out (I put mine in another steel pan and put it in the cold oven until it all cools off. You can reuse the salt too), and let the pan cool just a tad.

  8. As the pan cools, dust out the salt and burlap fibers with a paper towel. Get it nice and clean.
  9. Before the pan cools too much pour some canola oil in it. The pan still needs to be hot though. I guess if you can dance water droplets across the surface, then it's probably too hot still. If the canola is smoking when you pour it on there, it's too hot. Right below the smoking point is what you are looking for.
  10. Make sure the oil coats all of the cooking surface. Dump out the oil and wipe the surface with a paper towel.
  11. This egg was scrambled in the pan with a bit of butter.
    Amazing! If only I could get it to cut through tin cans
    then through a tomato.
  12. Cook an egg in the pan. Take satisfaction in cooking on a surface like Teflon but a) won't kill you and b) is resurectable.

Friday, December 17, 2010

Ad hoc pork carnitas

I used to be really into charcuterie. A few years ago, I wound back my meat eating to almost nothing. Pork is the cornerstone of great charcuterie and is something we rarely eat now. Of course any time we go to breakfast, Maddie gorges on bacon, but otherwise, we're pretty much a pork-free house.

This time of year I can't help myself. I gotta make at least one holiday pate. So there's pork around.

I started a country pate tonight -- I ground some pork butt and added a bunch of goodies to marinate into a forcemeat.

I had a bit of pork butt left over. So I made carnitas. Yum.

When my mom was about 45(?) she went to California Culinary Academy for two years. Part of her training was an externship. I don't know why cooking schools call what everyone else calls an "internship" an "externship," but they do. Anyway. My mom spent 6 months or so working at the Jordan Winery where she worked with some hotshot chef guy to put out big fancy dinners for high rollers.
This is so easy it's just crazy. I put red peppercorns in it cause I had them.
Red peppercorns are hard not to put in just about everything.

But she said the best part of that job was working during the days in the kitchen with the Senoritas. Aside from prepping and helping the hotshot chef the Senoritas' main duties were making sure the pickers, growers, and farmhands were well-fed. Since all these guys were Mexican, it made sense that Mexican women ran the "work" kitchen. So my mom ended up learning great Mexican cuisine from the Senoritas.

And she really learned the cuisine. She came out of there cooking amazing Mexican food with the same comfortable, second-nature ease that she had when she whipped out a roasted chicken or a quick French loaf. Mexican was my favorite of all the "new" stuff Mom learned in her time at CCA. And this particluar recipe makes me happy this time of year.

Pretty much done, but a guy could cook this for another 15 minutes or so.

She showed me this carnitas recipe about 10 years ago when we were doing some Christmas charcuterie cooking. Everyone was gone doing Christmassy shopping and running around. We had a bit of pork left over and she knocked this little cook's treat out and we enjoyed it in a quiet house after cleaning up. These are great to eat right out of the pan, or laid out onto tortillas as I've done here -- with whatever you have on hand.

This makes enough for two to four people to snack on.

Stuff
  • One pound pork butt or blade steak, cubed into small bite sized bits.
  • Some or all of the following: 3-4 dried peppers, 2 bay leaves, 1 TB dried oregano.
Method
  1. Put the pork and spices in a heavy saute pan or cast iron pan and just cover with water.
  2. Cook on medium-high until water gently boils away.
  3. Turn heat to medium-low and let the fat render out of the pork. The idea now is to slowly fry the pork in its own fat at low heat for at least 30 minutes.
  4. When all the little pork bits are crusty and yummy it's done.

Sunday, December 12, 2010

Anisette holiday cookies

Maria makes these cookies every holiday season. They are wonderful dipped into coffee. We have fun making these together every year.

The picture in the top banner of this blog is a picture of the anisette cookies from a few years ago.

For the last couple years our friend Beth has joined us. Beth can charm Maria into teaching us all the good Sicilian bad words and phrases.
All Sicilian cooking starts
with a "spirited" discussion.
And is resolved with a smile.


This recipe makes a huge pile of cookies, about 5 dozen. We do two batches at a time. But it's against Marian law to double the recipe. It must be done in two batches.

Stuff

Cookies:
  • 6 cups all purpose flour
  • 6 eggs
  • 2 cups sugar
  • 1.5 cups shortening
  • 7 tsp baking powder
  • 1 bottle (1 oz) anise extract
Icing:
  • 2 cup powdered sugar
  • 1/2 bottle (.5 oz) anise extract
Bling:
  • Sprinkles!


Method
  1. Preheat oven to 400F.
  2. Separate eggs.
  3. Beat the whites to soft peaks. Beat the yolks in a separate bowl until frothy and pale.
  4. Pour the beat yolks into the whites and beat slowly while adding sugar to mix.
  5. Add anise extract to eggs and mix.
  6. Put the flour and baking powder into a big mixing bowl and stir to mix.
  7. Add shortening to bowl and work into the flour with your hands until the shortening is incorporated into the flour uniformly.
  8. Beat the yolks well.
    Until it hurts.
  9. Pour egg mixture into flour and continue to work with your hands until a soft dough forms. Add flour or a bit of milk to get a nice baby's butt soft thing going.
  10. (Optional): If I were the king of the world, I would let the dough rest in the refrigerator for  20 minutes or so before the next step. But that's also against Marian law.
  11. Roll clumps of dough into strips about 8-12 inches long to the diameter of about a standard Sicilian index finger.
  12. Make nice shapes and put the cookies on a thick baking sheet.
  13. Bake for 10-12 minutes.
  14. Make the icing: mix powdered sugar and anise. Add a bit of water to make a thickish paste icing that will flow slowly.
  15. Let cookies cool. Pour icing over the cooled cookies. Add bling. Give away or you'll be in trouble.


Maria dips top of cookies into icing while
Beth sprinkles with bling.

Rolling out the dough.
The cylinders are twisted into pretty shapes.

Maria, Liza, Beth. Rolling and twisting.

Maria working the egg mixture into the dough.

Maria explains the double meaning of the word, Bacala.

Saturday, December 11, 2010

New year's resolution: bake bread again


I used to do a lot of baking. About 8 years ago I started Owen, which was the name for our natural yeast starter. I really got into attempting to bake artisan-style breads. I never really nailed it. I made bread that was great and I really loved, but I've never totally and utterly nailed the bread that I wanted to. I'm not sure if I ever will.

About 3 years ago I stopped making our regular bread. Even though we dialed in a great process which really minimized our time dealing with the bread, we just got too busy with other stuff and I reluctantly dropped the bread out of our daily routine to balance out other stuff. Plus, we had my mom cranking out amazing breads. So it wasn't a huge loss since we still had great bread all the time.

My mom grabbed a bit of Owen about a year after I had started it and she subsequently baked all of her breads with that same starter. She made a great ciabatta.

Mom always made great bread. When we were kids she always made this really super hearty whole wheat loaf. It's all the bread we had - I'd make these giant sandwiches out of thickly cut home made bread and be embarrassed opening it up at lunch it as my buddies unwrapped their tidy little Wonder bread delights.

My mom died a few months ago. Recently, my sister and I went through my mom's kitchen stuff and took a few things. The biggest thing I took, certainly the heaviest, was her old Hobart mixer. It's the perfect size for a home baker. Given the huge size of the Hobart, it probably seems grandiose on the surface, but the fact is, if you get into rustic/artisan/substantial breads, you will go through mixers like crazy. I've killed two. One was a super 6 quart Kitchen Aid, the other was a normal 5 quart Kitchen Aid. And these were the "heavy duty" ones. They just can't turn a sizable substantial dough. And by Hobart standards, this one is dinky. But it's perfect for the home.

This Hobart will allow me to make an easy 6 loaves at a time. Mom would do 12, but she sold her bread. Quickly. I usually keep 1/2 and give away 1/2.

So, my goal in the new year is to figure out a baking schedule where I can put out about 6 loaves of hearty yummy daily driver bread every week. Owen is hibernating in my mom's freezer. He's a tough old bird and I have no doubt he'll be enthusiastic in his revival come January.

Thursday, December 9, 2010

Liza's Wild Rice Squash

Liza has made this a couple times this winter. It rules. Maddie loves it, which makes it a winner every time.

It's a Liza invention. Substitute olive oil for the butter and it's an easy vegan dish.

Stuff:
  • 1 large acorn squash, halved
  • 2 TB butter
  • 1 celery rib, chopped
  • 1/2 cup onion, chopped
  • 1 medium carrot, chopped
  • 2 cups chopped mushroom
  • 1 1/2 cup cooked wild rice
  • 1/4 cup soy sauce

Method:
  1. Put squash cut side down on baking sheet and bake in a 375 oven for about 45-50 minutes. Liza actually puts her squash in a little toaster oven at 400 for about an hour.
  2. In a frying pan on medium-high heat, melt butter and then saute celery, onions, carrots until just soft.
  3. Add mushrooms, cook until mushrooms sweat and begin to brown.
  4. Add rice and soy. Stir it up to warm through. S&P to taste.
  5. Serve with the squash which has been quartered, and with a good winter-hoppy ale.

Sunday, December 5, 2010

Panelli


My MIL Maria lives with us. And it's rad. But she's leaving for a few months. She'll be visiting her other childers in NorCal, then she'll be off to Italy for a few months to hang with her clan. She's saying we won't see her until later in 2011. :(

So, we're getting lots of Maria cooking before she goes. I'm not as prolific as I'd like to be in documenting her cooking. The stuff that ends up here are some special favorites, but they're not daily things. The daily things are what I need to get: Calluzzi, Pasta con Lenticchie, Bistecca Milanese, Pasta e Fagioli, Pasta e Brocoli, Caponata, Juicy Steak, and others that I'm forgetting.

Anyway. Maria made Panelli today. I can't get enough of these. Here's the recipe, ported off my old website, with some pictures from today.
 ~~
Another Maria favorite. These are just simple, yummy treats -- another Sicilian comfort food. Best eaten hot with some basic white supermarket "french" loaf.

Yield: makes about 24 pieces

Ingredients


  • 4 cups garbanzo bean flour. We've had the best luck with Bob's Red Mill. There are better ones, but not as reliable to find. The worse (inedible) was a fancy expensive organic flour. Maybe it was rancid? Anyway, Bobs Red Mill bags are 4 cups.
  • 4 teaspoons salt
  • 1 tablespoon dried parsley
  • 5 cups water
  • 3 emptied and cleaned 12 oz tin cans
  • canola oil for frying

Method

  1. Mix dry ingredients.
  2. Slowly work water into dry ingredients. Mix with one hand, using your fingers and breaking up the clumps. Mix all the water in until there are no lumps.
  3. Put the mixture on the stove in a pot. Stir continuously, scraping up the bottom with a flat-topped wooden spoon. Stir continuously. This stuff sticks no matter what, but keep working it off the bottom of the pan.
  4. As it heats, it will thicken. It will thicken in clumps. Don't be alarmed at this, just keep scraping and stirring until the whole mass turns into a big mortar-like clump.
  5. Take it off the heat, and spoon the mixture into the tin cans. Knocking the cans on the counter top to pack the mixture in.
  6. Chill the cans for a few hours. The panelli will get solid as it cools.
  7. when the panelli is completely chilled through, slide it out of the cans, and slice. You should get about 8 or 9 slices from a can.
  8. Make a small incision in the center of each disc to let air escape during frying.
  9. Pour about 1/2 inch of oil into a heavy pan and heat the oil until it just barely shows faint wisps of smoke.
  10. Fry the panelli until golden, then flip and fry the other side.
  11. Sprinkle with a bit of salt and then drain on paper towels or on a rack.

Tuesday, November 30, 2010

Brocoli Pastetta and Pasta con Brocoli


Here's a great way to use cauliflower for two dishes. Brocoli Pastetta is what's in the picture above. In American cuisine, we'd call these cauliflower fritters. You slice the cauliflower just so, par-boil it, then batter and fry it. Damn. So good. Because you can only use the nice slices for the Pastetta, you have a bunch of little cauliflower bits left over, that's what makes the Pasta con Brocoli, which is my favorite pasta dish.

Maria makes this combo about 2 or 3 times a year and I go crazy for it. In my mind they both seem like they would fall into the "comfort" food of Sicilian cuisine. So good.
I've made both dishes with her a few times and I can now lay out the recipe for both of them

Brocoli Pastetta
Yield: this recipe, made with two heads of cauliflower, makes a big pile -- great for appetizers for around a dozen folks or so.

Ingredients

  • 3 cups all purpose flour
  • 1.5 teaspoons garlic powder
  • 2.25 teaspoons baking powder
  • 1/4 cup dried parsley
  • 2 teaspoons salt
  • 5 eggs
  • 2 cups water
  • 2 large heads of cauliflower
  • canola oil for frying

Method


  1. Make the batter first: mix dry ingredients in a medium bowl.
  2. Beat in the eggs and water, cover the bowl. Let the batter rest while you prepare the cauliflower.
  3. Core the cauliflower and separate into flowerettes. Save the nice, tender bits of green stem, cut out the core and eat it as you work. You'll use the green stem and small bits of cauliflower for the pasta.
  4. Slice the cauliflower so that the stem structure holds it together.

  5. Rinse the sliced cauliflower in cold water.
  6. Boil the cauliflower slices until just tender. They should just slide off the tip of knife when you stab them.
  7. Lift the slices out of the water (save this water) with a strained spoon or basket and shock them in ice water to stop them from cooking further.
  8. In a heavy pan (cast iron, or enameled cast iron is ideal), heat about an inch of oil until you can just see small wisps of clear smoke.
  9. Batter the slices of cauliflower and carefully slide into the oil; cook until golden. Watch the heat on your oil; after the first batch goes in and cools down the oil, it will heat up again and you can back off the heat a bit.
  10. Drain on paper towels or on a rack.
  11. Serve hot, room temp, or cold. And hide some for yourself; these go quick.


Pasta con Brocoli
Yield: this recipe, made from the remains of two heads of cauliflower, is good for a pound of penne pasta. That's a lot of pasta. Easily feeds 6 with salad, bread, etc.

Although the recipe below doesn't mention it, you can also throw in a handful currants and/or pine nuts when you add the cauliflower.

Ingredients

  • Left over bits of cauliflower from Brocoli Pastetta. My guess is that you'll have around 4 cups of bits.

  • The bowl on the left is what we had the last time we made this; the bowl on the right shows the slices for the Pastetta.

  • 2 tablespoons olive oil
  • 1 yellow onion, medium, diced small
  • 2 cloves garlic, sliced
  • one tin of anchovy fillets
  • pinch of saffron (optional)
  • crushed red pepper
  • 1/2-3/4 cup grated parm
  • 1 pound of penne, cooked al dente

Method
  1. In the same water you boiled the cauliflower slices in -- boil the bits. Bring the water to a boil, then cover the pot and turn it off and let the cauliflower steep in the hot water as you prepare the sauce. These bits get pretty soft.
  2. Heat the olive oil in a big sauce pan on medium-high. When the oil is hot, saute the onions until soft, but not browning.
  3. Add the sliced garlic and all but one fillet of the anchovies.
  4. Stir with a fork and crush the anchovies into the onions.
  5. Add the saffron if you've got it.
  6. Cook until mixed up and the anchovies have melted away into the onions and garlic; a couple minutes.
  7. While you wait, eat the remaining anchovy on a piece of crusty bread.
  8. Lift the cauliflower bits out of the water and into the saute pan; don't worry if there cauliflower bits are a bit wet; you want the water to help make the dish saucey.
  9. Add a pinch (or more if that's your deal) of red pepper flakes and saute until the cauliflower is all mixed in with the onions.
  10. Add a 1/2 cup or so of cauliflower water and reduce it down a bit. Maybe cook/high simmer for 3-4 minutes. In lean times, add a bit more water to stretch the dish out.
  11. Stir in grated parm and penne and heat through. Serve with crusty bread.

Tuesday, November 23, 2010

Leek Potato Soup


This is an old Liza chestnut. It's standard by Leek Potato Soup standards. Liza whips out some version of this soup on a pretty regular basis. I like to eat it with Brother Bru Bru's African Hot Sauce and crusty bread.


Liza got this recipe from Eliot's Extraordinary Cookbook. But she's made it so many times that it's sort of become her own.


Stuff
  • 2 leeks, cut lengthwise, cleaned, and chopped.
  • 2 TB butter
  • 4 potatoes, peeled and chopped
  • 1 tsp salt
  • 1/2 cup milk

Method

  1. Saute leeks with butter over medium heat for about 5-7 minutes.
  2. Add 3 cups water and bring to a boil.
  3. Add potatoes and salt and simmer for 20 minutes.
  4. Mash with potato masher.
  5. Add milk, season with pepper and more salt to taste.
  6. Serve.


You can vegan-ize this recipe by swapping out the butter with olive oil and the milk with soy milk. No one will ever know.

You can also add left over salmon or frozen corn or other interesting things too, ya know.

Chicken liver omelet


One of the first things my mom taught me to make was a chicken liver omelet. I've always been a freak for chicken liver.

Fun fact: Did you know there was a time in the late 70's when you could get a liver bolognese at the Spaghetti Factory? Can you imagine how great that would be today? There was also a Sundae Burger at the Onion at about the same time. I think it was #33. We didn't go out much when I was a kid, but when we did, I did it up.

Anyway. Mom taught me to make a chicken liver omelet when I was 4 years old. My parents had divorced and I lived with my sister and mom in a little 2-room house in Onion Creek, Washington. The house was quaint in that non-running water, non-electrified, out house kind of way. So mom taught me how to cook an omelet on a wood cook stove.

Liza prefers her yearly liver sans omelet

That was the beginning of my love of big thick steel for cooking. Nearly everything was cooked either in a cast iron pan or in the case of quesadillas, right on the stove top.

I love wood cook stoves. Very versatile: you have this big hot platform where you can boil water on one section, keep something warm on another, fry on another, all while baking in the oven. They rule and once you get to know them, they are very dial-in-able.

About 8 years ago, I got my dad to bring me an old chestnut for baking. Once we got it dialed in, the baking was great, but we also found it great for making jam and other outdoor cooking projects. If we had a bigger place, we'd still have a wood cook stove.


Anyway. Thanksgiving time is about the only time I have a liver omelet anymore. Liver isn't on the menu here much. If I were making this for guests, I'd make this a bit different. I'd cook it in a proper omelet pan to make sure I could easily turn the egg to cook it 'merican style without browning it.

I like a bit of wet to my omelet. In my experience, wet liver omelets don't go over so well with family and friends. But whatever -- this recipe makes it right -- for me and in the memory of my mom, who appreciated the same preparation: in a cast iron pan, cooked from the bottom till it browns a hair and folded onto the plate. With cheddar of course. Normally we'd use chicken liver, but this is with turkey liver.

Stuff


  • A bit of liver. If you are using chicken liver, then 3 livers is about right. For turkey, maybe 2. Cut the turkey liver into chicken liver sized chunks (think fig size... for lack of a better example)

  • Onion or shallot, about a teaspoon minced. (optional, we didn't do this back in the day)

  • Butter. Canola oil.

  • Couple tablespoons of shredded cheddar

  • S&P

  • Two eggs, beaten with a splash of milk

That's too much liver for one omelet. Some of that is for Liza.


Method


  1. Warm your cast iron pan on medium high heat.

  2. Season the room temp liver with a dash of salt and pepper.

  3. Add a hearty teaspoon of butter to the pan. Add a dash of canola oil to keep the butter in check.

  4. Fry the onion/shallot for a minute or two to soften.

  5. Add the liver to the hot pan. It should sear. Put a screen over the pan. Sometimes liver likes to blow up. Consider turning the heat down if there's a lot of noise and activity in the pan.


  6. Cook until the liver starts to bleed a bit. Good fresh liver from a source you trust can be cooked until it's just pink in the middle. Don't over cook it. It will cook a bit more in the omelet. Pull it off the heat and wipe out your pan. You may need to let the pan cool for a minute or two.


  7. Turn the heat down to medium.

  8. Put another hearty teaspoon of butter in the pan. It should sizzle, but not brown immediately. If it browns immediately, you're still too hot.

  9. Pour the egg in the pan and do the omelet thing where you push the egg towards the center to cook the liquid egg. Do this until the egg sets.

  10. Lay the liver down the middle of the omelet, sprinkle with cheddar, season a bit with s/p.


  11. Roll the omelet out onto a warm plate.

  12. Eat with toast.