All the Spokane food-related stuff that I can't figure out how to wedge into my other blog.

Saturday, April 9, 2011

High heat


As we eat more meat, I am getting more into cooking. Weird how that works. When it comes to meat, I'm really into the sear, which requires a lot of heat to really pull off well.

I've been obsessed with heat before. Years ago when we lived on the west side of the state, I figured out a great quick super hot grilling solution where I used a camping stove under a Lodge cast iron grill pan. I mainly used it for fish.

Lately I've been trying to figure out how to cook tri-tip steaks quickly and yummily. At heart, I'm a cheap bastard, so tri-tips appeal to me because they're usually around $5/lb. If they're cut thick, I'll butterfly them to around an inch or so.

In my opinion, the tri-tip should be seared over a screaming hot fire for about 3 minutes a side. Then let it rest. And slice it against the grain. Piled on bread or over a salad, it's pretty good.
Click for big: dig that char baby! What a difference serious heat makes.

The problem is that in the last 10 years, I've gotten rid of all of my high-heat-makers: I got rid of a hibachi, a small "brazer" grill, and a small Weber kettle. And I can't find that Lodge cast iron grill pan either.

So, today, I made an inferno cooker in the back yard. I don't think this is a good idea as the weather dries out, but the mulch under the bricks is still damp for now. In any case, it raged. With one measly chimney full of briquettes, I had a super hot surface.
I charred some peppers and made a salsa. Then I made the tri-tips, which I rubbed with salt, pepper, fresh rosemary, and garlic. Then I grilled asparagus, Brady style. And toasted some English muffins.
I love cooking over that kind of heat. The peppers just blistered and crackled as soon as I put them down. Nice.

I may have to do a butterflied chicken tomorrow on the big Webber. Maybe with a Mexican angle so we can stuff it in tortillas and have a reason to eat the salsa we made tonight.


I wish Lodge made a bigger, shallower version of their hibatchi.

Monday, March 28, 2011

Wood Sorrel

I grew up munching on this wild green that grows all over the California bay area. We had it growing in our yard in San Jose, CA, where I lived until I was 8. On hot days, my friends and I would eat stalk after stalk. My mom called them "agrodolce," which is Italian for bitter sweets. Apparently they are common in Italy too.

Now I've come to know this wild green as Wood Sorrel. It is a tart and juicy little plant that's very thirst quenching. The leaves and flowers are edible as well. Oxalic acid (think rhubarb) makes it sour, and you wouldn't want to eat pounds of it because it would destroy your tooth enamel and might give you a gut ache.

Good in salads, on sandwiches, or make a soup with it. Otherwise, if you're on a ride this spring/summer, give it a try. Disclaimer: do some research and never eat something you cannot positively identify! I wouldn't want you to eat something toxic! A helpful, but not definitve guide from Landscape America.

Sunday, March 13, 2011

70th Annual Kosher Dinner


The dinner and apps:
Beef brisket, spiced apples, carrot tzimmes and potato knishes, dill pickles, pickled herring, 3 bean salad

The dessert: Apricot kuchen, chocolate rugelach

Bread:


Challah
The talented acts, to entertain while you wait:

The Mavens, The Vogel Brothers, Sam Adams, Chutzpah! and more
The happy patrons:


Liza, Elissa, Beth
You cannot put on a benefit dinner for 70 years running without mastering the food, entertainment, and all the many event details. Even so, mastering the details does not have to mean a stellar event. I have been to similar events, but lacking the heart of the Kosher Dinner, these other events were real bores.

Temple Beth Shalom's Kosher Dinner is a fundraising event with heart and so much soul. The food is amazing, the entertainment makes you smile and tap your feet, and the volunteers can't wait to help and welcome you.

If you missed the dinner this year, a steal for $15, then make sure you go next year. Bring some friends and carpool (or ride your bike) to TBS for some Jewish soul food. If you'd like to learn more, TBS recommends myjewishlearning.com

Saturday, March 12, 2011

Making our kitchen more useful

Over the years, I figured out that I need a lot of counter-mess space when I cook. And I like to have stuff close by. I hate rummaging through stacks of pots, pans, cooking sheets, whatever -- when I'm trying to cook. It can put me in a foul mood and makes cooking less fun.

But when we moved into our current house, I wasn't cooking much and didn't care a lot about the kitchen, other than to make sure it met some minimum counter space requirements and that it had a hood to vent smoke.

As for high-zoot kitchens, I don't really care about bling in the kitchen. But it would rule to have a bad ass BlueStar range and a more powerful hood that could actually suck up the smoke from a properly seared hunk of meat. We are definitely going to install a better hood, but I'm too cheap to spring for the high-zoot stove. For now.

Last weekend made a wonderful change to our little kitchen nook. Until recently, it was Maddie's desk and drawing area. Now it's a place for more counter space and a place to hang the pans that were stacked under cabinets and in our downstairs pantry.

My buddy, Glen, is a wizard with anything made of metal. He had this solid piece of steel rod in his shop. He welded a chunk of stainless chain to it, and voila! A bad-arse, no-nonsense pot rack. I dig it.

Under the table, there is space to store the big pots that were also previously downstairs.

Next, I'm going to angle for a little shelf space.

The new change is great. And super simple and cheap.

The desk/table thing we have is just the right size for a hunk of marble we had laying around and a big cutting board from my mom's stash. The marble is great for setting hot pans aside when we're in the thick of cooking. The cutting board is in a great spot: good light from the windows and out of the way of anyone else in the kitchen.

Sunday, February 27, 2011

Spicy braised ox tails

I've been into cheap cuts lately. I love braising cheap cuts. My buddy Adam taught me how to braise ox tails many years ago. It was probably 15 years ago. Before the Food channel outted cheap cuts, these cuts were actually cheap: flank steaks, hangers, brisket, shanks, ox tails. I'm thinking ox tails were less than a buck a pound at Don and Joe's in Pikes Place Market back then. I paid $4 a pound at Huckleberries yesterday.

Anyway. This preparation can also be used for lamb shanks if you're feeling flush. Braising makes these cuts super tender where the meat falls off the bone. Be sure to attempt to get the marrow too.

You can do all sorts of stuff with the resulting meat. You can just eat it. Or you can take it off the bone and stuff it into tortillas with fresh guacamole, a bit of cabbage and queso fresco. As it turns out, as I was out buying ox tail yesterday, Liza got a hankering for grits. She made them in a crock pot with some chopped spinach, diced onions, minced jalapeno, and a bit of jack cheese. Pretty much a perfect platform for these spicy ox tails.

Tip: Don't chop the chipotle in adobe on your cutting board.
This recipe serves two hungry people, or you could stretch it to four with some salad and stuff.

Stuff
  • 2 lbs of ox tail sections
  • 1/2 yellow onion, sliced
  • 1/2 carrot, chopped
  • 1/2 cup red wine
  • 1 12 oz can of chopped tomatoes with chilies (don't drain off liquid)
  • 1/2 - 3/4 can of chipotle in adobe sauce, chopped

Method
  1. Set oven to 325 F.
  2. Salt and pepper the ox tails verily.
  3. In a non-reactive pot, sear the ox tail over medium-high heat in a bit of canola oil. Brown all sides, don't crowd them. As they brown, set them aside.
  4. Pour off the beef tallow so just a tablespoon or so remains.
  5. Add chopped onions and carrots and stir until just soft.
  6. Add red wine and scrape up any bits on the bottom of the pan.
  7. Add tomatoes and chipotle and bring it to a boil. If it's watery, cook it down a bit.
  8. Add ox tails to pot. They shouldn't be totally submerged. If they are, cook it down a bit more, or move it to a shallower pan.
  9. Put the lid on the pot and load it in the oven.
  10. Cook it for 3 hours. You can hold it for an hour or two after it's done in a 150 F oven.

Saturday, February 26, 2011

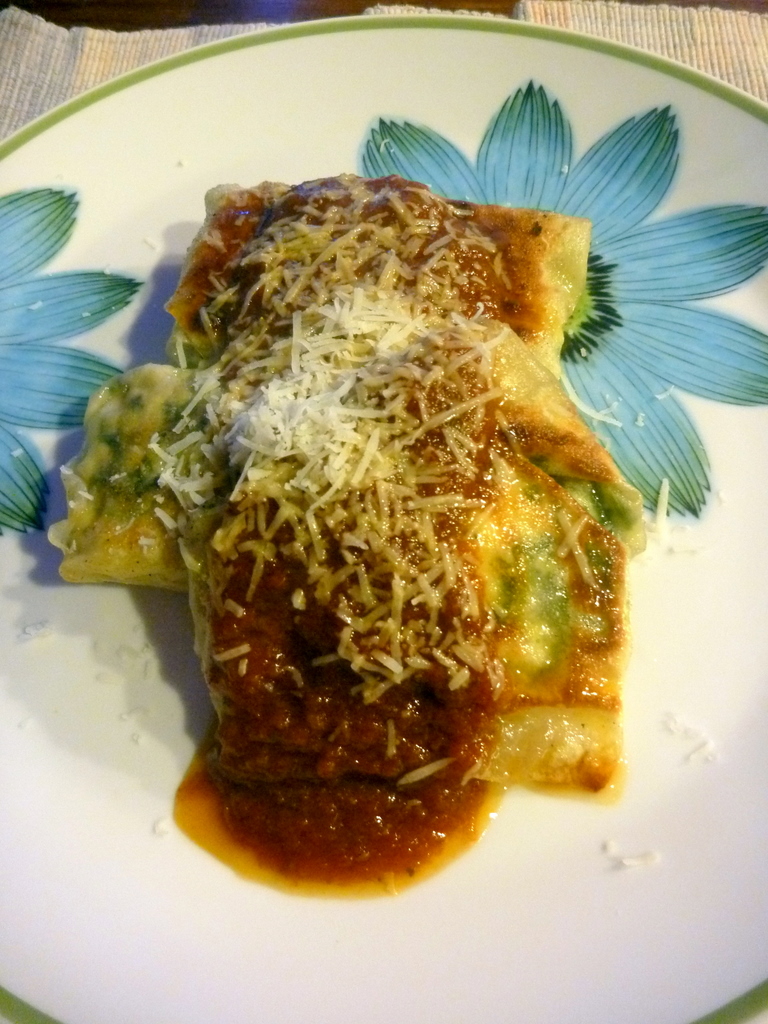
Liza's Quick Wonton Raviolis

Kids love 'em!
Liza invented these. About 13 years ago, my mom showed us how to make potstickers. When Liza and I first started living together, we'd wow our friends with big platters of potstickers and homemade ponzu dipping sauce. We haven't made those for years, but we have realized that frozen wonton wrappers are a great secret weapon to have up your sleeve.

So, Liza took the wonton secret and combined it with a bit of her Italian sensibilities and her vegetarian requirement. If you want to go vegan, you could probably swap out the feta for 1/4 cup of nutritional yeast.

If you press the tofu ahead of time, this is a quickie.


Stuff
- Wonton wrappers
- Marina sauce
- Filling:
  • 1 lb of tofu. Pressed for a couple hours. Then crumbled.
  • 3/4 cup crumbled feta
  • 1 box frozen chopped spinach. Thawed, drained.
  • 1 glove garlic, minced
  • 2 TBS olive oil
  • juice from half a lemon
  • S&P to taste
Method
  1. Combine all the ingredients for the filling and mix gently.
  2. Put a little gob in the center of a wonton wrapper and wrap it up. Wet the edges of the wrapper a bit to help it stick.
  3. Don't do the submersion boil thing with these guys, as they'll probably not survive. Instead, put a bit of canola oil in a hot non-stick pan. Put a few raviolis in there, but don't crowd them, as they like to stick together once they get wet.
  4. Have a lid for the pan at the ready, because this next part is a bit shocking the first time.
  5. Pour about a cup of water into the pan and then immediately cover it with the lid. I like to use boiling water, but that amplifies the cracking, steaming, noisy explosion of oily watery activity. In any case, the water should just cover the bottom of the pan. The lid shouldn't be tight-fitting -- lots of steam should escape. You're steaming these suckers.
  6. Leave the lid on (so steam escapes) for about a minute, then take it off. The water should be cooking off now. If it takes more than 30 seconds or so, pour off the water. Then flip the raviolis.
  7. If you need to add a touch more oil, then do it. Saute until brown.
  8. Serve with warm marinara and cheese.

Sunday, January 9, 2011

Cheater's Chilito

This is another recipe that my mom learned from the Senoritas.

It's a salsa made from dried chilies. It's one of my favorite salsas and with so many different dried chilies available now, it's fun to play around with. I call it "Cheater's Chilito" because this is a faster way to make it than how my mom taught me.


Her method uses a mortar and pestle to grind the ingredients into a paste. She also used 3 fresh tomatoes instead of the paste I use here. If you use tomatoes, substitue three peeled, seeded, and chopped tomatoes for the paste. It's better than the paste, especially if you have fresh tomatoes. But paste works too.

Mom would approve on two fronts: making the recipe your own, and "doing what you need to do to make it work."

Find any dried pepper and experiment -- dried chipoltes is always an easy winner. I like to start with chile de árbol for a little heat, then add a milder, more complex chili to compliment. Usually I have New Mexico chilies around, but today I found some anji panca chilies, which, apparently are from Peru. It turned out nice, dare I say just a tad fruity?

This makes about 1/2 cup.
Stuff
  • Some dried chilies. For example: 6 chile de árbol and 4 anji panca chilies.
  • Pinch of dried oregano
  • 1 clove garlic
  • Pinch of kosher salt
  • about 2 teaspoons tomato paste
Method
  1. Heat a thick cast iron pan on medium heat. Mom used a comal -- which is like a cast iron pan without sides.
  2. Put the dried peppers in the pan and slowly heat them. Turn them every few minutes. The idea is to get them slightly colored and to drive out any remaining moisture. The chile de árbol will be done before the bigger peppers, which will puff up a bit as they gently char.
  3. Remove the stems and put the chile de árbol in a coffee grinder. Grind into a powder. (If you don't have a coffee grinder specifically for spices a good way to clean out the coffee stuff is to put a hunk of bread in there and grind it up. That will clean out the coffee bits).
  4. Once the bigger peppers are done, you'll need to open them up and remove the seeds. Then grind the skins in the grinder.
  5. (Optional) Put the seeds in the pan and give them a light toast -- reserve those too. I have a jar of toasted random chili seeds and bits of charred skin. When I need chili powder, I grind some up.
  6. Put the ground chilies in a small bowl.
  7. Mince the garlic. Then put a pinch of the kosher salt on the garlic and crush with the side of the knife until it's nearly a paste. Add the garlic to the bowl of ground chili.
  8. Add the thyme and the paste to the bowl.
  9. Add just enough boiling water to mix it all up into a paste -- about 1/4 cup. Mix it up and let it sit for an hour or so.