 |
| Ready for the freezer. Then delivery. Then baking. |
One reason is that I am too lazy. So I'll do lazier posts. Instead of getting all crazy with recipes, methods, etc, I'll just lay out the basics. There's nothing here that isn't just basic down home cooking that can't be found with a quick search.
Anyway. We've got 3 friends that just recently had a kid. That is: three couples. Each couple recently and unrelatedly had a kid. We're making a chicken pot pie for two of the families. That is: one pie, each for each of two families. The third will get a sack of Zip's burgers.
This is as easy as it gets for super comfort home-cooking radness. It's made even easier by breaking up the tasks across a few days and sharing the workload.
Lots of pics!
Day 1 - Stock n Roast
Buy a whole chicken. Always. It's such a bargain: you get the bird for at least half the price per pound than you pay for any single part. AND you get liver, bones, and all sorts of goodness for stock making. Sometimes I'll buy skin-on, bone-in thighs, but 88% of the time, I just buy the whole bird.
Cut it up in 8 pieces: two wings (chop off the ends for stock), two legs, two thighs, two breasts. Chop the back in half. Save the liver.
Roast it: salt and pepper the wings, thighs, legs, breasts. Leave the skin on. Put them in a roasting pan and roast at 400-425F. Go about 12 minutes, then turn them. Let them go for another 10 minutes or so.
Meanwhile, stock: heat up a pot on the stove top, find some aromatics. Put a bit of canola in the pot and let it get hot. Sear the backs in the oil until they are brown on all sides.
Dump the aromatics in with a couple quarts of water, bring it to a boil and turn it to a hearty simmer for about 30-40 minutes. Skim off the fat. Pour the whole lot through a sieve to save the stock.
Back to the roasting stuff: take the chicken out of the roasting pan and pour the fat out of the pan. Put the pan on the stove top over medium heat and scrape up the bits with a wooden scraper. Pour about 1 cup of wine, or beer, or water into the pan. Heat + wet + wooden scraper: cleans the bits up perfectly. Dump this pan dripping (along with bits) into the stock you just finished.
When the chicken is cool, bone it and then chop it up. Skin and all.
Day 2 - Make the pot pie filling
You've done the hard part. Now just put it all together, warm it up, season it, and thicken it.
Find and chop some aromatics. Ideally, a couple stalks of celery, a couple carrots, and an onion. We didn't have any celery and the only onion we had was a Walla Walla. So, I went with leeks and celery instead. Heat up a pot with a bit of olive oil and get those guys going. You can always chop up bacon at this point too -- makes a nice little chewy treat in there when all is said and done.
Potato is optional, but we had one, so I peeled it, chopped it up, made a mental note to add a touch more salt at the end, and threw it in there too.
Make a roux too. Since I was making two pies (I had to add another 2 cups of stock from our freezer to what's mentioned above), I ended up with about 1/4 cup + a bit of butter and 1/4 cup + a bit of flour. If I wasn't rushed, I would've let the roux go a bit longer to darken it a bit more. I love the smell of roux -- smells like butterscotch.
Once the aromatics start to soften a bit, dump your stock and chicken bits in there. I simmered this until the potatoes were *just* toothsome -- they'll cook a bit more during baking. Now is the time to season. Salt and pepper is all you need. If I had fresh rosemary or thyme, I'd have tossed some of that in there.
Pour off a few ladles of the broth into your roux pot, then dump the roux into your soup to make it a filling. The crust will soak up moisture and so will the potatoes, so don't go all gravy at this point. Back of spoon test should show nice cling, but dripping.
Pull it off the stove, dump it in a thin metal bowl and add frozen veggies (beans, peas, carrots, whatever) to help it cool. Put the bowl in a sink with ice and cool it quickly and package it up for day 3.
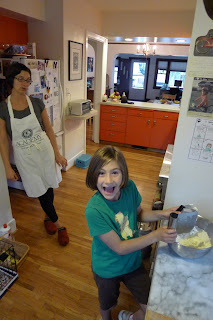
Day 3 - Have a Jedi Crust Maker hook you up.
Liza has turned into a crust pro. Find a pro or become one. But don't dump this mixture into a store-bought "shell." It requires a rad crust.
If the crust thing is just not going to happen. Then go biscuits. Preheat oven to 425 F. Dump your filling into a cast iron pan, warm it up a bit on the stove, then cover the top with biscuit dough, in pieces or rolled out. Then bake it.
Otherwise, take care of business and do the dough deed.
Fill the dough with filling.
Top the dough. make it pretty.
Freeze it. And give it all away.
To eat: preheat oven to 425 and bake for at least an hour. Watch for over-browning of the crust after 40 minutes or so. Cover the edges with tinfoil to keep browning at bay.


No comments:
Post a Comment